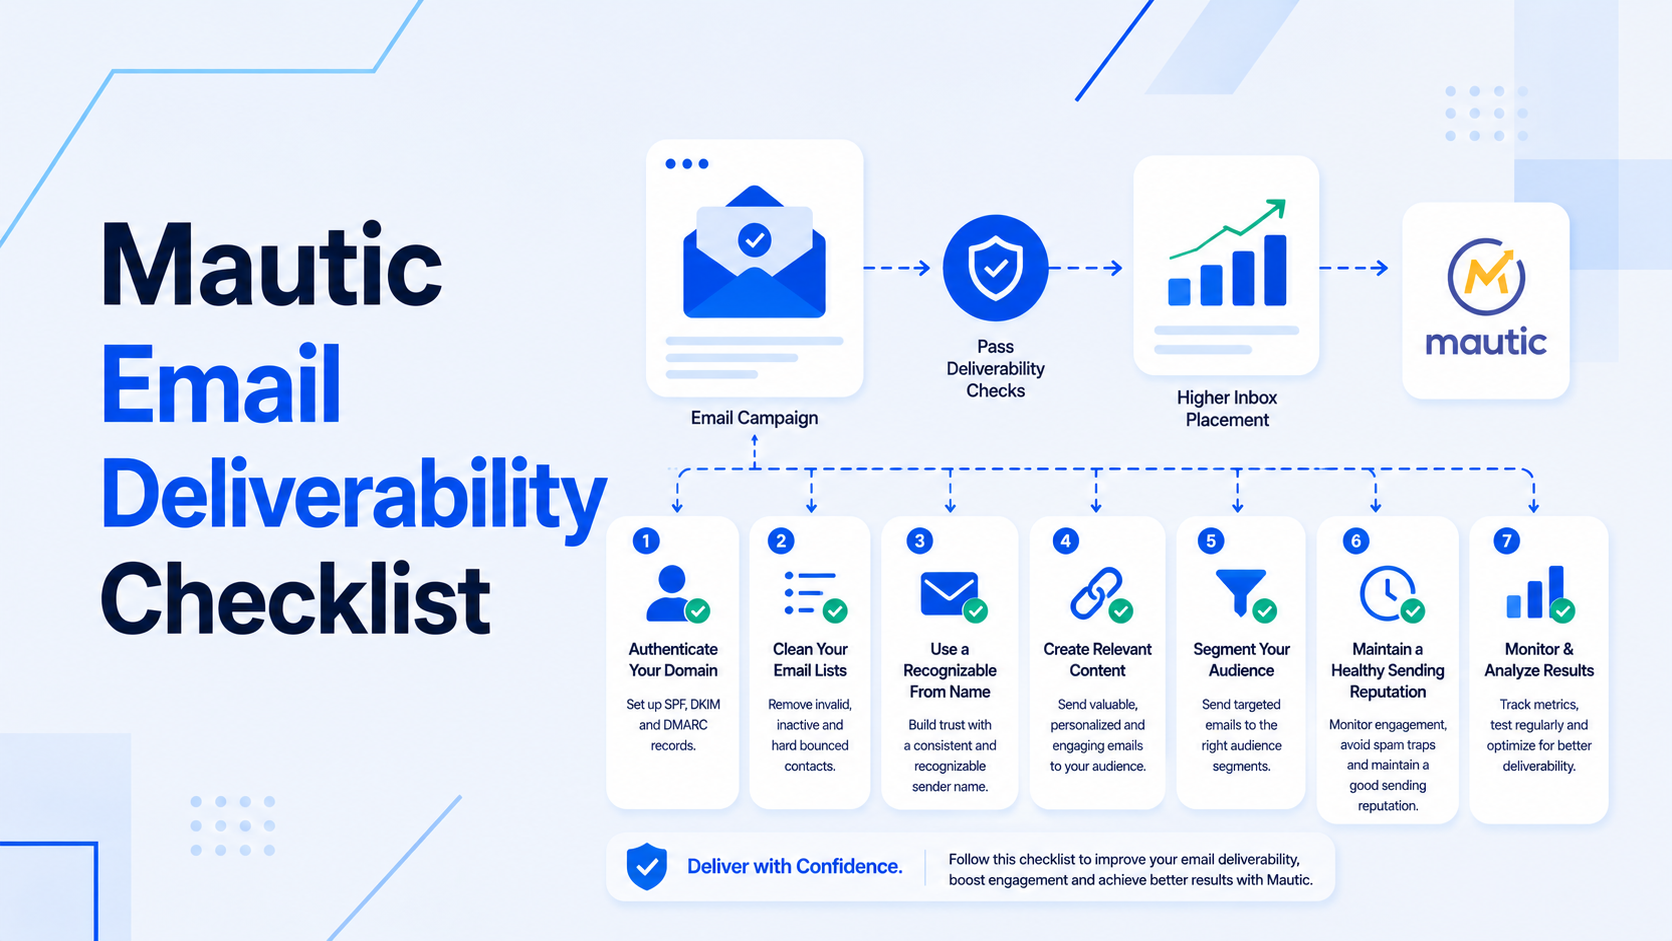
No matter how well-designed your marketing campaigns are, they will not yield results if your emails end up in Gmail's spam folder or are blocked by recipient mail servers. When self-hosting Mautic, you are fully responsible for setting up and maintaining your email deliverability infrastructure. This technical checklist will help you configure your sending domains, SMTP relays, and bounce feedback loops to ensure maximum inbox placement.
1. Domain Authentication: SPF, DKIM, and DMARC
Authentication is the foundation of sender reputation. Email providers use it to verify that your Mautic server has permission to send emails on behalf of your domain. You must configure these three DNS records:
- SPF (Sender Policy Framework): A TXT record that lists all IP addresses and domains authorized to send mail from your domain. For example:
v=spf1 include:amazonses.com ~all - DKIM (DomainKeys Identified Mail): Adds a cryptographic signature to the header of every email sent by Mautic. This proves the email was not altered in transit.
- DMARC (Domain-based Message Authentication, Reporting, and Conformance): Ties SPF and DKIM together. It instructs recipient mail servers how to handle emails that fail authentication. Start with a monitor-only policy:
Once you verify that authentication is stable, upgrade it to a quarantine or reject policy (v=DMARC1; p=none; rua=mailto:dmarc-reports@yourdomain.comp=quarantineorp=reject).
2. Choosing the Right SMTP Relay
Do not try to send emails directly from your local Mautic server (using PHP Mail or Sendmail). VPS IP ranges are often pre-blacklisted. Instead, connect Mautic to a reputable SMTP relay or email API service. Excellent options include:
- Amazon SES: Extremely cost-effective ($0.10 per 10,000 emails) and highly reliable.
- Mailgun: Excellent API-first delivery, automatic warming, and robust log search.
- Postmark: Exceptional delivery speeds and transactional focus. Excellent documentation and support.
3. Configuring Bounce and Unsubscribe Feedback Loops
If you ignore bounces and spam complaints, email providers will quickly block your sending domain. You must configure Mautic to handle these events automatically:
- Bounces: Set up a webhook or SNS notification from your SMTP provider (e.g., Amazon SES) to post bounce data back to Mautic's bounce callback endpoint. When Mautic registers a hard bounce, it automatically marks the contact profile as do-not-contact (DNC), preventing future delivery attempts.
- Unsubscribes: Always include an easy, one-click unsubscribe link in your marketing emails. Configure Mautic's global unsubscribe settings to handle these requests automatically. This respects user preferences and keeps you compliant with CAN-SPAM and GDPR regulations.
4. Domain and IP Warm-up Strategy
If you start sending 10,000 emails a day from a brand new domain or a new dedicated IP address, email filters will flag it as spam. You must gradually warm up your sending volume over several weeks:
- Week 1: Send 50-100 emails/day to your most engaged contacts.
- Week 2: Increase volume to 200-500 emails/day.
- Week 3: Increase to 1,000-2,000 emails/day, monitoring delivery rates closely.
- Week 4+: Scale up to full capacity as your domain reputation builds.
5. Monitoring and Blacklist Sweeps
Use tools like MXToolbox or GlockApps to check your domain against common email blacklists (like Spamhaus, Barracuda, or SORBS) weekly. Set up Google Postmaster Tools to monitor your domain's Gmail spam rate (keep it below 0.1%) and authentication success rates.
For help setting up a reliable email delivery system, configuring SMTP connections, or optimizing campaign performance, check out our Mautic Customization Services.

Prakash Tank
Full-Stack Architect & Tech Enthusiast. Passionate about building scalable applications and sharing knowledge with the community.